

")
")
")
General principles of working with Python
For further development of the satprowler control program, I decided to switch to the Python programming language. The reasons for this change are as follows:
- In Python, separate threads can be programmed, so parallel programming is possible.
- Enigma Linux satellite receiver plugins are written in Python. If in the future I want my positioner to communicate with the receiver, such a plugin will need to be written. So I wouldn't avoid programming in Python anyway.
- Python is going through a stormy evolution. It became a very fashionable language that entered the consciousness of the general public. It can therefore be assumed that a possible future user of my design will master the basics of Python.
I also know a few reasons why switching to Python is not a good idea. As a supporter of the classic programming languages Pascal or C++, I cannot accept some "simplifications" of Python, which, in my opinion, make writing programs quite complicated. Mainly in the field of finding and fixing errors. The second reason is that the frequent release of new versions of Python complicates the backward compatibility of written programs. It's hard to say what Python will look like in a few years. But progress cannot be stopped.
There is no need to select the Raspberry Pi computer in order to use Python. A 40-pin GPIO connector is still crucial to have enough lines to communicate with the positioner. So it is possible to use a Raspberry Pi 3 or anything newer. But getting the Raspberry Pi up and running has changed slightly since my first articles.
As an operating system, I still use Linux Raspbian, which today is simply called Raspberry Pi OS. Its current version can be downloaded here. Nowadays, it is convenient to use the 64-bit version, especially in connection with the newer Raspberry Pi 4 or 5. For our use of positioner control, the Lite version is sufficient. For older versions of the Raspberry Pi 3, it would make sense to use the 32-bit "Legacy" Lite version as well, but I haven't tried that.
I use the Raspberry Pi Imager program, currently version 1.8.5, to upload the OS to the SD card. You can download it here. Here I draw attention to a very fundamental change compared to older versions of the OS. The authors have tightened up security measures considerably. So the various procedures to get the SSH terminal up and running after the Raspberry Pi is booted for the first time no longer work. For this, there are menus in Imager where you choose what to activate and with which user password. If you don't need to have a copy of the OS on your computer, Imager can download it from the web itself. I currently used the Raspios-bullseye-arm64-lite.img version from 12/5/2023 (the "Legacy" version).
I still use the PUTTY terminal to SSH to the Raspberry Pi. You can download it here. This program has also undergone its development, so I recommend using the latest version. Older ones have a problem with modern encryption. I am currently using version 0.76. If you do not know the IP address of the Raspberry Pi in your home network, it can be found with the IP-Scanner program. You can download it here. I used version 2.4.30. You don't need to install it, just run it. You can recognize a Raspberry Pi 3 by the MAC address starting with the numbers B8:27:EB... After a successful connection, the first OS setup is performed.
sudo raspi-config
Here I usually set:
- 1 System Option, S5 Boot, B1 Console
- 5 Localization: L2 Change Timezone, Europe, Prague
- 5 Localization: L4 Change Wi-fi Country, CZ Czech Republic
- 6 Advanced Options, A1 Expand Filesystem
- and finally <Finish>, reboot now? Yes
The following updates are standard Linux. I last installed them on March 4, 2024.
sudo apt-get update
sudo apt-get upgrade -y
sudo reboot
Python is already part of the OS. Therefore, we simply cannot choose which version we want to use. If we are interested in the current version, enter the command:
python3
This will start a python interpreter that will print the current version information. It ends with the Ctrl+D key combination. My current Python version is 3.9.2.
Python can use today's extensive base of ready-made libraries. The management of these libraries (installation packages and dependencies on other necessary packages and updates) is done by the PIP program. So it usually starts with its installation. Since we will only be using a few core libraries in our project, we don't need to use PIP and install the packages manually.
We will use the ready-made Flask Framework as a web server. You can find the home page of the project here and you can find the user manual here. To install it and install the supporting libraries, enter the following commands:
sudo apt-get install python3-flask -y
sudo apt-get install python3-flask-socketio
We will use the pigpio library to communicate with the GPIO ports. Here we will install it with the command:
sudo apt-get install python3-pigpio
Documentation for this library can be found here. Installing the package starts a daemon, a separate program that runs in the background as a service. This daemon is called pigpiod. Every time the Raspberry Pi is restarted, it needs to be restarted. This can be achieved by editing the /etc/rc.local configuration file, for example with the nano text editor.
sudo nano /etc/rc.local
At the end of it, before the command exit 0, we add the name of the daemon, i.e. pigpiod.
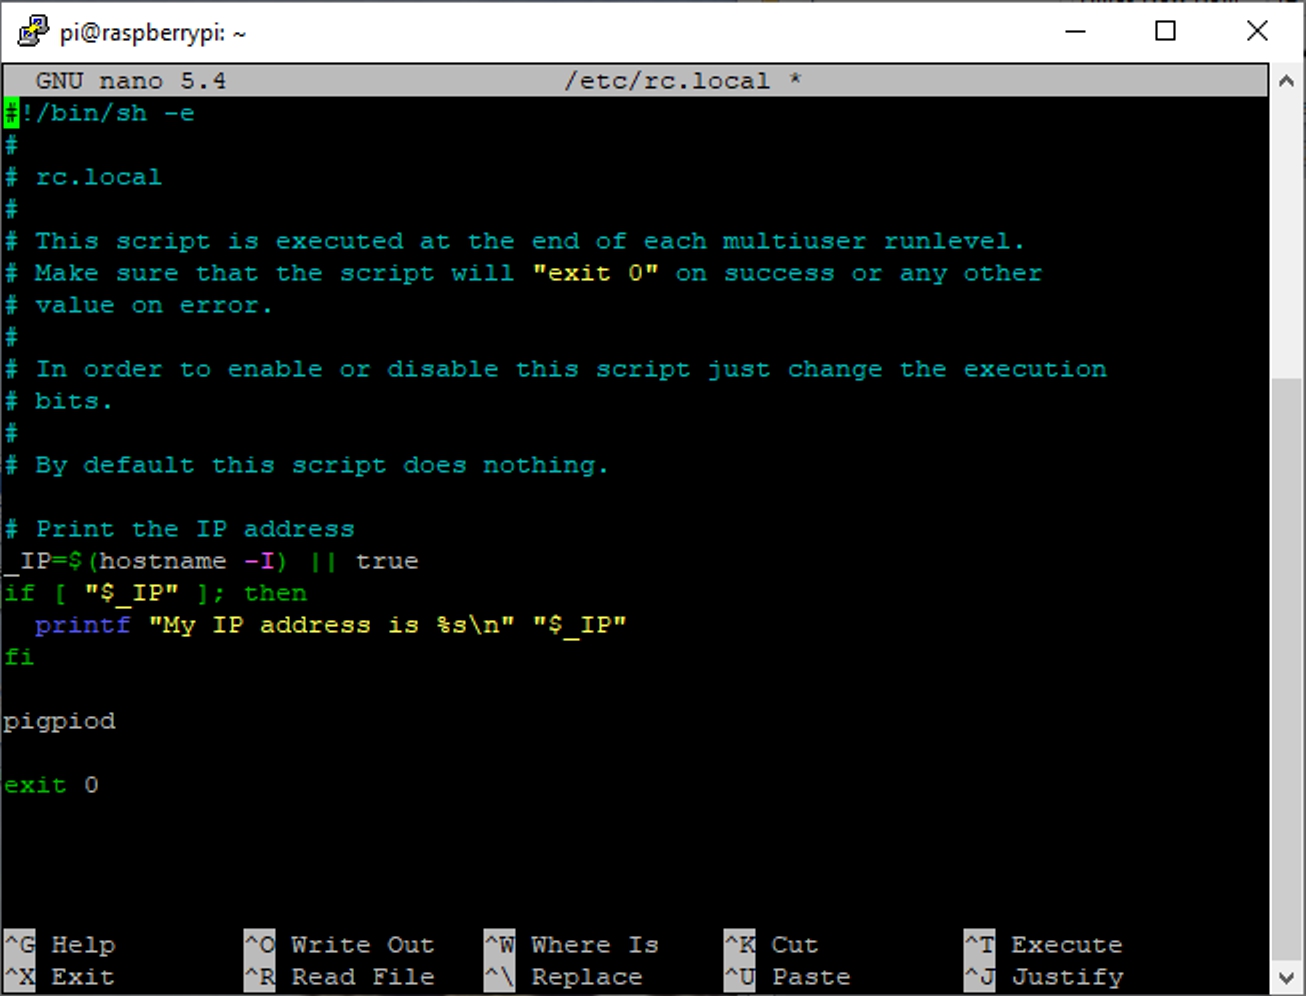
Fig. 2 - Running the pigpiod daemon permanently
Save the file with the Ctrl+O key combination and close the nano editor with the Ctrl+X key combination. To be sure, we restart the Raspberry Pi one last time.
sudo reboot
This makes the Raspberry Pi ready to run a Python program.
We will communicate with the Raspberry Pi through the Flask web server. This program has its own rules that we must follow. The first one is the directory structure. I use the Filezilla ftp client to work with directories and files. You can download it here. I am currently using version 3.66.5. After connecting, we create a subdirectory in the /home/pi/ directory with the name of our project, i.e. satprowler. This directory must contain the following subdirectories:
- static for static objects
- static/css for styles
- static/img for pictures
- static/js for javascript support
- template for html pages
As we go through the source texts for a particular project, they will be deployed, including all supporting files, in this directory structure. The main satprowler.py program is located in the main satprowler directory. It's actually a walkthrough for running a Flask web server, complete with positioner routines.
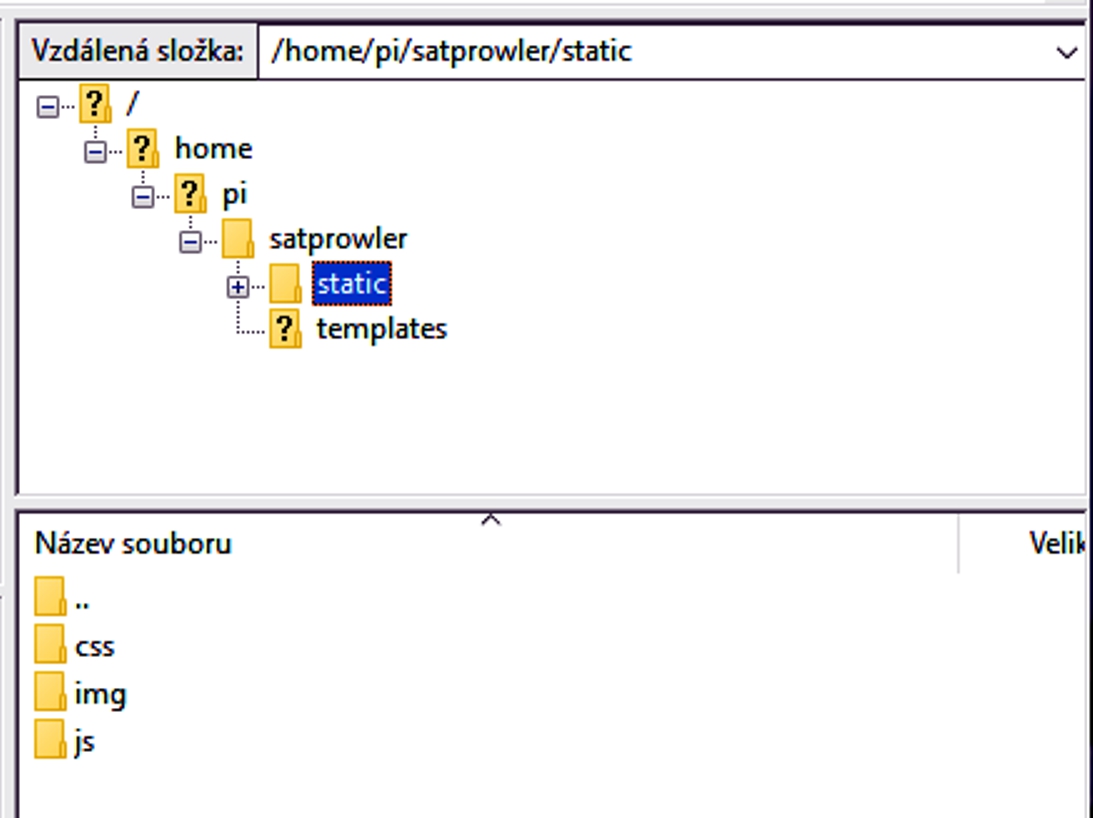
Fig. 3 – Directory structure of the project
At this point, we could already fill the directory structure with the files of the current project.
The program can be run in two ways.
1) Temporary startup for tests:
- Connecting a putty terminal, the terminal is automatically set to the home directory of the pi user /home/pi/
- Move to project subdirectory with command
cd satprowler - Start a web server with a command
python3 satprowler.py
A program started in this way only runs until the putty terminal connection is terminated or until the satprowler program is terminated with the Ctrl+C key combination. The program writes all messages, including error messages, to the terminal. Therefore, this method is used for testing and debugging the program.
2) Permanent program launch
To keep the program running permanently and to be able to communicate with it at any time, you need to proceed as follows. We open the /etc/rc.local configuration file with the nano text editor
sudo nano /etc/rc.local
and between the lines pigpiod and Exit 0 we write
cd /home/pi/satprowler/
python3 satprowler.py &
We save the file with the Ctrl+O key combination and close the nano editor with the Ctrl+X key combination. After restarting the Raspberry Pi, the program will run automatically without the need for a terminal.
sudo reboot
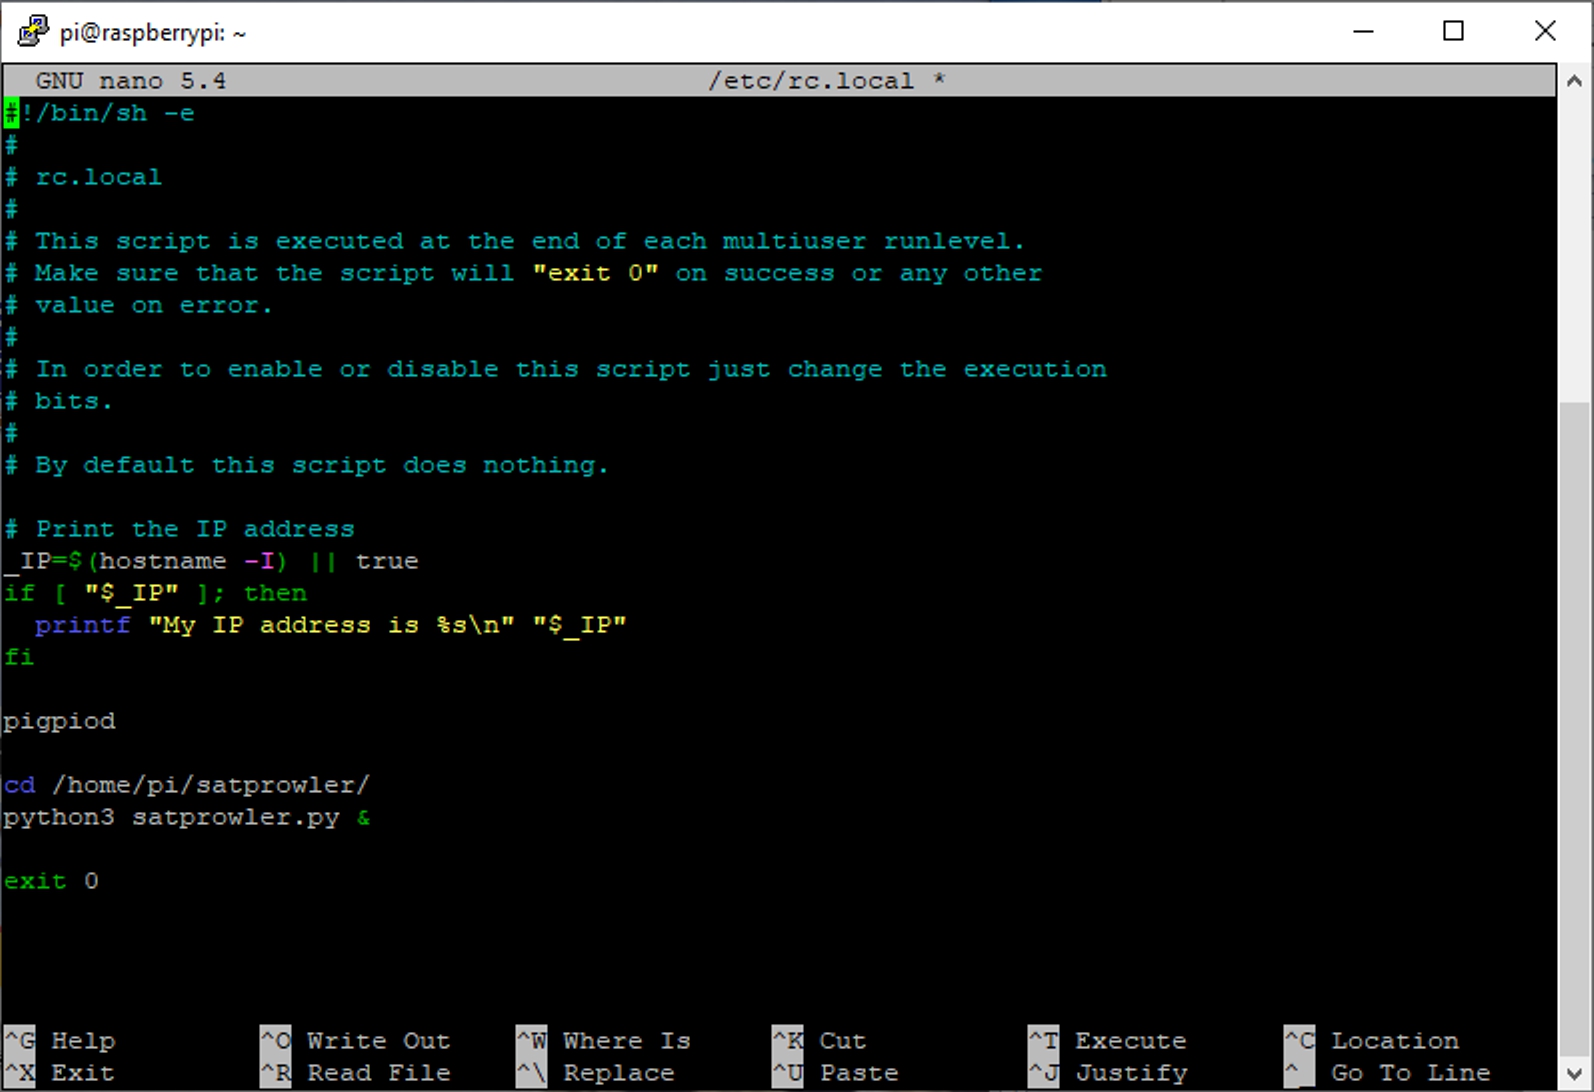
Fig. 4 – Permanently running the web server
Nowadays, the rc.local file is gradually being replaced by other mechanisms in some Linux distributions. Therefore, in the future, it may be necessary to replace the described process of automatically starting the program by setting up services using systemd.
The positioner is used by typing in the next computer's web browser the IP address of your Raspberry Pi with the port the server is listening on.
http://192.168.xxx.xxx:8080
You should see the main page with all the controls.
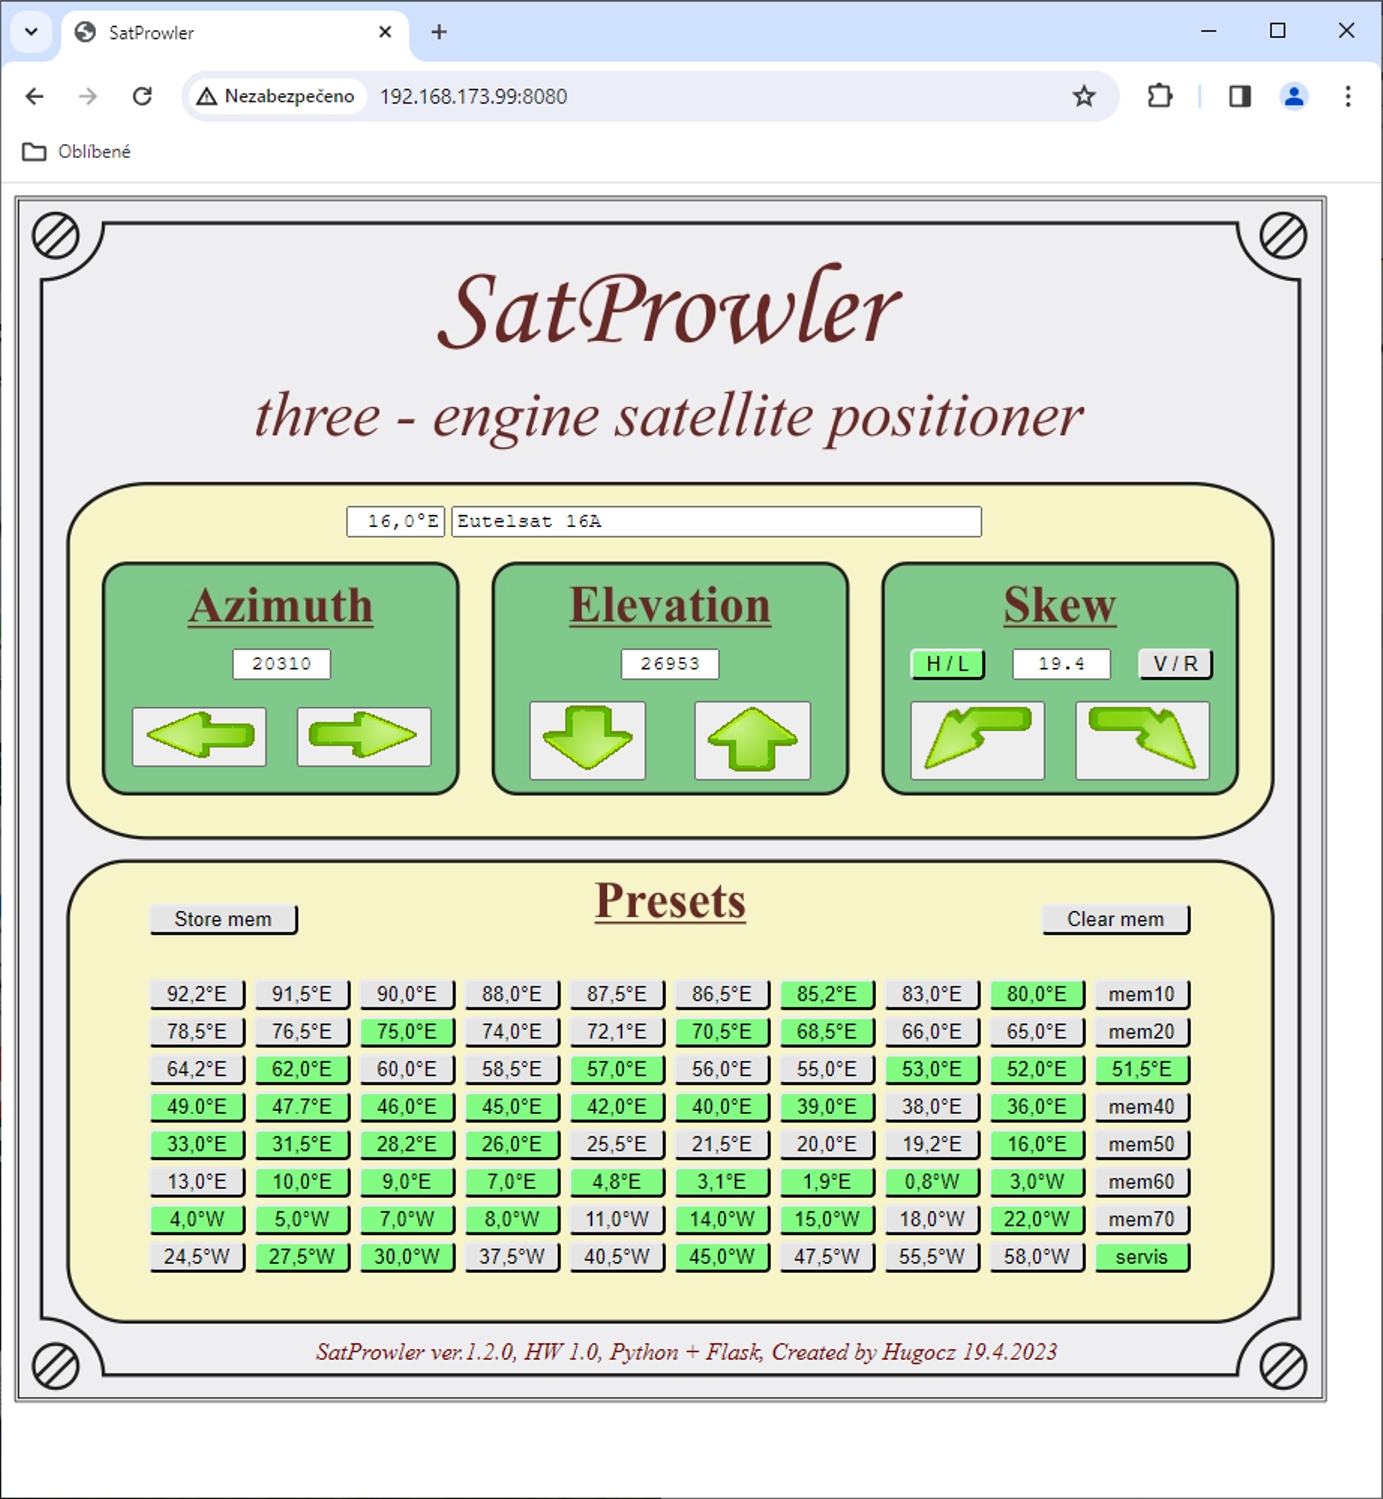
Fig. 5 – Example of a possible web interface of the positioner
Issues that are not yet resolved:
Asynchronous javascript functions are used to communicate back and forth between the web browser and the Flask server. The source texts of some functions are located on the websites of the authors. I haven't been able to get them working locally yet. This means that an active internet connection is required to run the program. Without it, these scripts don't work.